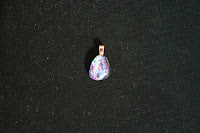
Calling this one Hot Lava

Like Firey Opal

Very "Far Side of the Moon"

Love this one. Looks like opal

I'm blogging because I find glass facinating. I love the colors. I love the transparency. But I don't always love the results. Here's my journey....


 This was 2 firings for the image and the picture I took doesn't really show the design. The method and firing times are pretty much the same as the above. Here are the differences:
4 1/2" square BE Thin Black with 3mm BE clear on top.
The first firing I brushed pixie dust onto a ginko leaf. Then I topped it with enamel (mixed with water) and pressed onto the black. I played around with the image, painting on more enamel, getting lines to represent the veins, etc. After the enamel dried, I capped with clear and fired. After I took it out of the kiln, I noticed a big "blobbed" area of pixie dust on the right...very out of proportion with the amount of pixie dust on the rest of the leaf design. So I painted on pixie dust on the clear to hide it and refired. You can still see the "blob" but it does get camoflaged with the topped pixie dust fired on top. There's an interesting 3-D effect with the image fired on the black and on the clear.
Again-the mold was 1/4" fiber paper.
This dish/candle holder is OLD. The plate was done last year. My original intent was to drop this into a vase. Then I would melt beeswax and make it into a candle. I bought the SS slumping holds (cute-only 2 1/2" high) but I have such a hard time getting the kiln wash to stick that I've given up. (I will still try with thin fiber paper and no kiln wash, but after the holidays).
BE black, Glassline bronze lines, BE Adventurine green sqares on 2 corners.
And here are some jewelry pieces. I need a better camera and a better set up to really get decent pictures of small pieces. The blue used silver foil and up close has a nice, subtle apprearance.
The black piece has 2 dichroic stringers going across. Very Pink Floyd Far Side of the Moon-ish.
More to follow, including the "wasted" pieces that bubbled and broke, just didn't come out the right way, etc.