Wednesday, December 30, 2009

Pendants


Calling this one Hot Lava


Like Firey Opal


Very "Far Side of the Moon"
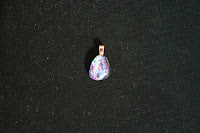


Love this one. Looks like opal


Wednesday, December 16, 2009

Change in template

So much easier to read. Now if I can only figure out how to make the font bigger.

Holidays are HERE! Candle holders galore!


This method was probably the most frustrating. I wasted so much glass and time trying to get it to work. One continual problem was with the glass bubbling from the bottom. I didn't hold at 1150 degrees so that might have been the problem. I fired this one a bit differently.

I used hair spray on the glass for a fixative then brushed pixie dust onto a ginko leaf that I pick up at the park. I pressed the leaf onto the glass - BE Adventurine Green (4 1/2" square) so the ginko leaf with it's veins showed. It's not capped. I tried different methods (hairspray on both glass and leaf, only on leaf, no hairspray at all) and using it on the glass only was the best method.


The mold used was just 1/4" fiber with a 3" circle cut out. (NOTE: Next time measure the candle first and make it Candle Dia + 1/2")

First Firing: Every 30 minutes I turned up the kiln one level until the temp hit 1150 degrees. I held for 30 minutes to release any gas under the glass and hopefully not have it bubble. After 30 minutes, I continued turning up the kiln 1 level until temp hit 1450. Held for 20 minutes then turned off kiln. Approx firing time 4 hours. It did bubble slightly but I figured it would fix itself during the slump phase.
NOTE: Because of the pixie dust, I wanted to fire to 1450 deg (full fuse) to have full adhesion of pixie dust to glass. Some pixie dust does come off but most of the image stays. Pixie dust is a separator so I think high temp is required. I haven't tried to see what it would be like with only a 1350 deg firing. Will have to try that later.

Slump Firing: Every 30 minutes I turned up the kiln one level straight through to 1400 degrees. Then I turned off the kiln. Approx firing time 2.5 hours. This slumped all the way down the sided (which I like).


This was 2 firings for the image and the picture I took doesn't really show the design. The method and firing times are pretty much the same as the above. Here are the differences:

4 1/2" square BE Thin Black with 3mm BE clear on top.

The first firing I brushed pixie dust onto a ginko leaf. Then I topped it with enamel (mixed with water) and pressed onto the black. I played around with the image, painting on more enamel, getting lines to represent the veins, etc. After the enamel dried, I capped with clear and fired. After I took it out of the kiln, I noticed a big "blobbed" area of pixie dust on the right...very out of proportion with the amount of pixie dust on the rest of the leaf design. So I painted on pixie dust on the clear to hide it and refired. You can still see the "blob" but it does get camoflaged with the topped pixie dust fired on top. There's an interesting 3-D effect with the image fired on the black and on the clear.

Again-the mold was 1/4" fiber paper.


This dish/candle holder is OLD. The plate was done last year. My original intent was to drop this into a vase. Then I would melt beeswax and make it into a candle. I bought the SS slumping holds (cute-only 2 1/2" high) but I have such a hard time getting the kiln wash to stick that I've given up. (I will still try with thin fiber paper and no kiln wash, but after the holidays).

BE black, Glassline bronze lines, BE Adventurine green sqares on 2 corners.


And here are some jewelry pieces. I need a better camera and a better set up to really get decent pictures of small pieces. The blue used silver foil and up close has a nice, subtle apprearance.

The black piece has 2 dichroic stringers going across. Very Pink Floyd Far Side of the Moon-ish.


More to follow, including the "wasted" pieces that bubbled and broke, just didn't come out the right way, etc.

Monday, November 30, 2009

BFs XMAS

12/25/09 - Now that the BF has this, I can post.

I started with a B/W picture of Mt Hood. By having a B/W, I was able to figured out some of the contours. Using a second layer for a distinction of the foreground, I used BE powder in white and Oregon Grey (appropriate) for the snow and shading. I also used BE white fine frit for additional texture.


Firing-Goal to tack/contour fuse

Turn on Lo

41 min - temp = 546 deg. Increase to Level 1

1:04 temp = 624 deg. Increase to Level 2

1:20 temp = 768 deg. Increase to Level 2.5

2:00 temp = 983 deg. Increase to Level 3.0

2:05 temp = 1000 deg. Hold 15 minutes. Then increase to Level 3.5

3:22 temp = 1350 deg. Hold 10 minutes then turn off and let cool in kiln overnight.

(the pic is upside down)

My origian thought was to just put the above piece on clear and then glue onto the box I stained. When I put it up against the box, it just didn't have enought "pop" to it. So I figured I'd fuse to to clear irid. But when all placed together, it still wasn't too exciting. So I got the idea of having a background - sunset or sunrise for color. I didn't know how I was going to figure out where the right colors should be against the peaks since I'm used to putting on the powders, firing it, and then seeing where the colors hit and if they are in the right spots. I thought I'd try to put the powder down on a plate mold I have so I can see exactly where the colors are and how they will come through against the mountains. So I put the powder down, layed the clear irid on top, and then fired


Firing- Starting temp 78 deg. - Turn on Lo

At 25 min, temp = 500 deg, increased to Level 1

At 60 min, temp = 615 deg, increase to Level 2

At 1:20, temp = 790, increase to Level 3

At 2:00, temp = 1020 deg, increase to Level 4

At 2:15, temp = 1146 deg, increase to Level 5

at 2:52, temp = 1450. Hold 10 minutes then turned kiln off. Cooled in kiln overnight .


Firing - Goal to tack / contour fuse

I did a 3rd firing to attach the "mountains" to the "sky". I didn't want to lose the contours of the mountain peaks and I now have 3 layers of glass in areas. I only wanted to fire to 1350 degrees to keep the dimension.

Starting temp 71 deg. Turned on to Lo
At 30 min, temp = 465 deg, increase to Level 1.5

At 1 hour, temp = 665 deg, increase to Level 2.0

At 1:37, temp = 839 deg, increase to Level 2.5

At 2:14, temp = 1000 deg. Hold 15 minutes. Then increase to Level 3.0

At 2:38, temp = 1070 deg, increase to Level 4

At 2:50, increase to Level 6.0

At 3:02, temp = 1350 deg, Hold 15 minutes and then turn kiln off. Cool overnight in kiln.


When I attached the mountains to the background, the "peak" curled up. I did a second firing to lay it down. It didn't lay flat, but was better after the second firing, which I took longer. I also added some more powder and frit since it was loosing some texture.


Firing - Goal to bring to a almost full fuse temp long enough to soften the glass and lay the curled piece down, but not long enough or hot enough to loose the contours or the texture of the frit.

I reapplied the kiln wash so I turned the kiln on to dry the shelf. Starting temp when the piece was put in was 135 deg and kept in there for 15 minutes before turning the kiln on to Lo

At 1 hr, temp at 635 deg., increased .5 level

At 1 hr 30 min, temp = 730 deg., increased .5 level

At 2 hr, temp = 850 deg, inceased .5 level to 2.0

At 2 hr 50 min, temp = 1040 deg, increase to Level 2.5

At 4 hr 11 min, temp = 1220 deg, increase to Level 3.0

At 4:34, temp = 1300 deg, increase to Level 3.5

At 4:45, temp = 1350 deg. Hold 20 minutes, then turn kiln down to Lo

At 6:00, temp = 1110 deg, Turned kiln off and let cool overnight in kiln.


This is the final piece. I stained the box and attached the glass with Wellbond.

Playing with Enamels

Inspired by Van Gogh's Cafe Terrace
This was the first attempt using enamels. The brightly colored canopy is a second layer of BE glass, as well as the door frame in the lower left had corner. That was done with clear glass and powders. After the firing, some black enamel was used to define the different wood planes for the frame, but it isn't visible in this picture.

All the enamel was applied wet, using only water as the medium. 2 firings were required, both to tack fuse temps. Some enamel colors were blended like paint pigments to make a redish-orange, bluish-black and an orangy-yellow. The background blue was not blended, using blue and cobalt blue.

All the background was done in the first firing. The second firing was to add the tables and some additional details.


The purpose of this panel was to cover a big hole made when the on-demand water heater was installed. I put a 2' x 2' hole in the cabinet so the workers could easily install the required, expensive stainless steel venting. Since the water heater is in the kitchen, and the kitchen is in a faux-French look, I thought this would be appropriate. And I do have a watercolor of a Provence doorway, acquired when I was in Nice.
Looking at this in a photo (as well as in person) it could use more color to give it more interest, more depth, and more "punch", but impatience won over and I wanted this in the frame on covering that hole. It's only been...5 years? 6 years?
I may try and do a plate in all enamel to see how that looks.

Monthly Challenge entry - Ornamanet "Revels"


Nothing like waiting until the last minute to get a picture. This ornament was done a few weeks ago, but I didn't get a picture. I finally did it on the last day to enter.
This was the second attempt. When I fired the first one, one side pulled in so I had to recut and fire. This is all BE. The base is BE white. The notes are BE black and BE black stringers, as well as the stright lines.
WRITINGS:
The words are done with Liquid Stringer. I attempted several different things, but not really came out. I'm not really pleased with this, but it was the best of all the attempts.
Some of the attempts I tried, but didn't like the look was to use rubber letter stamps and stamp on the song with pixie dust. I couldn't get the text to "flow" and look right.
I also attempted the same thing with dry enamel and that didn't work.
I also tried to write with enamel that was made into liquid form using gum arabic and another attempt using water. Since the enamel doesn't really stick to the glass like it would to a porous material, it would pool up in areas. I'm assuming this might have been easier if it were a large piece, but this is only about 4" in diameter.
FIRING:
The first 2 were to tack fuse. First the stright lines, then a second firing to add the notes.
Turn on to Lo-starting temp 135 deg
At 1 hr. - increase dial to .5, temp at 635 deg
At 1 hr 30 min - increase dial another .5, temp at 730 deg
At 2 hr - increase .5 (Level 2) , temp at 850 deg
At 2 hr 50 min - increase .5 (Level 2.5), temp at 1040 deg
At 4 hr 11 min - increase .5 (Level 3.0), temp at 1220 deg
At 4 hr 34 min - increase to Level 3.5, temp at 1300 deg
At 4 hr 45 min - temp at 1350 deg. Hold at 1350 deg for 20 min.
At 5 hr 05 min - Turn down to Lo
At 6 hr - turn kiln off.
This same firing schedule was repeated for the second tack fuse firing.
The third firing was for the Liquid Stringer and went to a hire temp. The manuf. recommends 1500 deg, but I took this up to only 1450 deg, holding only 10 minutes. I didn't want to look the raised quality of the notes so I didn't take it up that high. I also didn't want the sides to pull inwards, causing me to start all over again.
Dance dance wherever you may be I am the lord of the dance said he...

Thursday, October 1, 2009

Missed the contest


Rules are rules and I forgot to take the pictures of these plates to enter into the monthly challenge. The sad part is that these were done a long time ago. I knew I was going to be on vacation and thought I'd enter these into the contest. I just waited too long to take the pictures.

Tuesday, September 8, 2009

Summers over!

Wow I never thought I'd be happy for summer to be over. I have my studio back and the weather is starting to come down. This week nothing in the forecast over 90 so that is good.

The Station fire is over 50% contained and no Santa Ana winds predicted. Why does this matter? Because it is so close to home, it has been consuming alot of my attention. Not that my house is in danger, but there are friends who's house's were. And since our workout group consists of some firefighters, there is a deeper connection regarding their safety.

I have ideas going through my head. I've got to put them in my journal before I forget. Then onto cutting and fusing! I'm hoping to post a sketch of my ideas this weekend. Gotta get back to things!

Happy Dance!

Tuesday, July 28, 2009

I hate this! It's been way too hot (100+) lately to work in the studio. And I'm now sharing it with bf's kids' xbox. But just for the summer and then they go home and the weather cools down.

So many ideas in my head. I need to keep my notebook handy so I can write them down. In a few months everything should be back to a normal schedule so I can work on things.

Monday, June 8, 2009


This piece was done with lots of trials and tribulations! See the earlier posts for failed pieces, but look pretty as a suncatcher in the trees!

This was BE powder. Center is white (not dense white), surrounded by canary yellow. The blue is powder blue.

I used masking tape around the edge so I can build up the powder to about 1/4" thick. Then I used water & gum arabic to "blend" the edges. While very wet, I dragged a wooden skewer outward to blend the colors. Then I blotted it and let it dry completely before full fusing.

First Fusing schedule:
Starting temp 70 deg
Lo for 50 min. Temp at 580 deg. Turn to Level 1
At 1 hr 36 min, temp at 746 deg. Increase to Level 2
At 2 hr 30 min, temp at 1000 deg. Hold at 1000 deg for 15 min
At 2 hr 45 min, increase to level 4
At 3 hr 45 min temp at 1350 deg, increase to Level 5
At 4 hours, 0 min, temp at 1450 deg. Hold at 1450 for 10 minutes
At 4 hr 10 min, turn down to Lo
At 6 hr 16 min, temp down to 1000 deg. Turned Kiln off overnite


RESULT: Originally this looked like an egg, or the center of a flower.

Second fusing: The face is drawn on with glassline, watered down to flow through a kemper tool.

Firing Schedule: Starting temp 72 deg.
Turn to Lo. Malfunction since at 60 min, temp still at 100 deg
Increase to Level 2
Increase levels quickly
At 2 hrs 47 min, temp at 1000 deg. Hold 20 minites
At 4 hr 20 min-temp at 1450 - hold 20 minutes
Turn down to Lo until 1000 deg
Turn off to cool overnight

This was too plain as a medallion, so I fired to BE 6mm purple. Concern about bubbles breaking through the surface since the bottom of the medallion was uneven with hills and valleys.

Added chads around the edge of medallion by using clear fine frit. Needed to ramp up slowly to 1000 degrees. And do a bubble squeeze between 1000-1200 degrees by holding at 1200 for 30 minutes.

Goal was to tack fuse with a rounded edge to the medallion, and to do a bubble squeeze slow ramp.

Firing Schedule:
6/6/09 Turn on to Lo
At 2 hrs 20 min, temp at 800 deg
Increase to Level 2
At 3 hr 15 min, temp at 1000 deg.
Hold at 1000 deg for 20 min (still at Level 2)
At 5 hr 53 min, temp at 1150.
At 6 hrs 21 min, temp at 1200 at Level 3
At 8 hr 0 min, temp at 1325 deg
At 8 hr 18 min, temp at 1300 deg
Turn down to Lo until temp at 1095 deg. (9 hr 10 min)
Kiln then turned off.

RESULT: Good- Did not have bubble breaking through surface. Edge of medallion was not as rounded as I wanted. I should have gone up to 1350 and held there for a longer time.

Tuesday, June 2, 2009


This piece was made years ago in glass, using all BE glass. The gold is pixie dust, mixed with gum arabic and topped with clear.

The black squares and yin/yang were fired first. Then they were placed on top of the red, along with the stripe of pixie dust that was capped. They were all a partial fuse to keep the shape and dimensions.

The original intent was to hang this in the bedroom. But when I brought this home and took it out of the car, I hit the corner on the door frame of the car and the corner piece broke off. I was going to refuse it on clear, but never got around to it. And I also had the concern about the weight and how I was going to hang this. So it got shoved under the dresser for the past 3 (?) years? It must have been after Dave moved in, but not much afterwards, I think?

So this past weekend, after Dave took out a wall for the patio, to expose a walkthrough to the Japanese zen garden, I decided to hang the piece there. I was thinking I might years ago, but never got to it. But the upcoming Summer Solstice run from our house has prompted me to spruce it up a bit...basically show off some of my stuff just a bit and brighten up some places.

The broken corner piece is now missing. I didn't grind down the edge so it is still sharp. I plan on finding that piece eventually. It wasn't where I put it, so somehow it got moved or displaced. Hopefully not thrown away. If I do find it, I plan on glueing it back with e1000.

This was attached to the cinderblock using a kit from HD for bathroom mirrors. It's nickel-plated steel. I was afraid the plastic mirror holders wouldn't hold up to the UV exposure outside, even though this area doesn't get sun all day.

Since I didn't fuse this, I don't have the kiln schedule. And this piece (13" x 14") is bigger than my kiln to begin with.

Saturday, May 30, 2009


3 firings
powder to Uroboros 8" plate

This is the final piece for the summer solstice run "metal." I think it's going to be mounted onto a plaque.

Tuesday, May 19, 2009


These were supposed to be for a "summer solstice" fun run. They didn't have the look I was trying for so Dave suggested drilling a hole and making them sun catchers. He put them up in the crape myrtle and they look nice there.

I realized before I took them out of the kiln where my mistake was. The earlier test piece with frit was make to look like a sunset. I used the same colors and format. But after I put them in the kiln, I realized I didn't want these to look like a sunset, but a sunburst. Big difference. So I have another one I'm going to fire this weekennd.

These are a clear base with:
BE white in center
Uroboros Marigold
BE Canary Yellow
BE Orange
BE Red
BE Purple Gold
BE Midnight Blue
The frit was built up to approx 3/8" thick. A water/gum arabic medium was used to bind and get the frit to flow.
I fired to Full Fuse

The next one will have
BE White
BE Canary yellow
BE Powder Blue
That will be posted after fired.

Saturday, May 2, 2009

VERY FIRST FUSING IN KILN


This was the first fuse in the kiln. It was supposed to be a full fuse, but ended up more like a partial.

12/27/08 - FIRST FUSING EVER!
Both pcs are thick BE.

Starting temp 48 deg. Turn on Lo
At 30 min, 440 deg., ramped to level 1.5
At 60 min, temp at 650 deg.
At 1 hr 30 min, temp at 796 deg. Ramped to Level 2.0
At 2 hrs 11 min., temp at 940 deg. Ramped to Level 3.0
At 2 hr 20 min, temp at 1000 deg. Held at this Level for 10 min.
At 2 hr 30 min, temp at 1050 deg. Ramped to Level 4.0
At 3 hr, temp at 1240 deg. Ramped up to Level 7.0 for rapid heat.
At 3 hr 10 min, kiln at 1480 deg. Turned to Lo for annealing.
At 4 hr 22 min, kiln temp at 1047 deg.
At 4 hr 46 min, kiln temp at 1000 deg.
At 5 hr 11 min, kiln temp at 980 deg.
At 5 hr 56 min, kiln turned off.

TEST BETWEEN WET AND DRY POWDER APPLICATIONS


This was a test done with frit. The left was applied "dry" with no medium to hold it. The right was applied "wet" with a medium of water mixed in with some gum arabic.

Other test pieces done at the same time. (not shown)
Desired result was that the baking powder or baking soda will bubble (as with baking).
Test 2 pc clear with dry baking powder in between
Test 2 pc clear with wet baking powder in between
Test 2 pc clear with dry baking soda in between
Test 2 pc clear with wet baking soda in between.

Wet medium was a 50/50 solution of water/gum arabic.
Results not shown-where the baking soda and baking powder were applied thickly, the powder didn't burn off and a white clump stayed-not at all attractive. The wet and dry methods had a different appearance when fused.

Where the powder went on VERY LIGHTLY, the baking powder and baking soda burned off and left bubbles. The light application was towards the outside so the burning off of the powder could have been affected by this. Must do another test piece where the whole application of powder or soda is a light film.

There didn't seem to be a difference of results between the baking powder or baking soda.


FUSING SCH
Starting temp 85 deg.
Turn kiln on Lo
At 45 min, temp = 520 deg.
Turn up to Level 2

At 1 hr 39 min, temp = 845 deg
Turn up to Level 3

At 2 hr 27 min,, temp = 1090 deg
Hold at this temp for 10 minutes. Played with control to keep kiln at this consistant temp.

After 10 minutes, keep at Level 3 and let temp rise.

At 3 hr 45 min, temp at 1450 deg.
Hold for 10 min.

At 3 hr 55 min, turned off kiln and let cool overnight.

Wednesday, April 29, 2009

Wannabe Eshler piece


BE Black 6mm
BE White 3mm
Glassline black, diluted and used a kemper tool to draw it on.

3/29/09 - fired to slump
Starting temp 68 deg
Turn on Lo
45 min. Temp at 528 deg turn up to Level 2
2 hours into firing time, 829 deg turn up to Level 3
2:30 hours, 960 deg, turn up to Level 3.5
At 2:40, temp at 1000 deg. Hold for 20 minutes, turning down to 2.5 to hold at this temp.
3:00 turn up to Level 3.5 When temp gets to 1250, hold 20 min.
4:45 Vent and turn off/Lo.
5:30 turn off at 950 deg.

Above = this schedule

400 dph to 1000.
Hold at 1000 deg for 10 min
Ramp up 200 dph to 1250. Hold 20 minutes
Cooled down to 950 deg. Hold 45 min


I didn't do the first firing. This was done in class. But I did slump it at home. When I slumped, the white devit. It's not showing up clearly in the pic. But I'm considering keeping it the way it is because it gives the white a parchment-like look.

I used the lap grinder to smooth out the edges, but I'm not getting the glossy finish on the edge. So I'm going to have to fire polish this piece.

Sunday, April 26, 2009


I didn't do the firing on this.
This was made with BE Turquoise and BE frits & powders: black, white and red. This was originally supposed to be just a bowl. It started with layers of color that was supposed to be water and koi. I didn't like the results, so I flipped the piece over and just added the koi. When I slumped the bowl, it bubbled. We did a second slump, hoping the bubble would go away. It went down, but was still there. So I decided to make a fountain out of it.

I was thinking about what the actual fountain would be. I bought a low, ceramic pot that was going to be the base. But the colors didn't work well together. Then my boyfriend brought home a resin pot (no drainage holes) that was going to get tossed. Perfect! And the bowl just BARELY fit inside.

Dilema...how was I going to get the bowl to stay up towards the surface? Solution...I cut 2" PVC pipe to hold it up. On the bottom of the pot and on the bottom of the bowl, using Gorilla Glue, I glued on 2 endcaps. I also cut a whole through the endcap that was being glued to the bowl so the tubing can go through. I also cut a whole in the 2" pipe, also for the tubing, so it can connect to the pump which sits outside the 2" PVC, on the bottom of the pot.

Theme-anything to do with the beach or ocean


Entry of the April contest.
1 pc BE Irid
1 pc Uroboros machine roll
kelp from torchworked BE
Urchin from BE strings with strings formed -torchwork
BE Crystal clear powder and Med Frit used to create bubbles.

First Firing 4/9/09
Starting temp 70 deg
Level 1.5 up to 1185 deg. Hold 15 min.
Ramp to level 5. 4:15 minutes into fusing, 1475 deg- hold for 20 minutes.
Turn to Lo
At 435 deg-turned off kiln

Results-spikes along edges, thermoshock on way down-corner broke

Second Firing
Added a back layer of Uroboros machine rolled glass. Topped this glass with a fairly thick layer of BE midnight blue powder with a medium of water/gum arabic. Then I added the result of the first fused piece, including the corner that broke off. I dammed up the sides because of the thickness. I let this dry overnight before starting the second firing.

1-Don't want to lose bubbles by trying to rapidly fire and only have a short hold at 1450 deg
2-Don't want thermal shock on the way down so I did a slower decrease in temp on the way down AKA more time on the way down.
Starting temp 64 deg
Turn on to Lo
@ 2:21 into firing time, 765 Deg-increase to Level 1
@ 1000 deg Hold 60 minutes
@ 4:41 into firing time, 1010 deg-increase to Level 3
@ 5:06 into firing time-increase to Level 3.5
@ 1150 deg-hold 10 minutes
@ 5:15-increase to Level 4
@ 5:20, 1250 deg-increase to Level 4.5
@ 6:30 temp reached 1450 deg. Held for 30 min.
Turned down to Lo
@ 10:15 into firing time-1000 deg
Turned kiln off